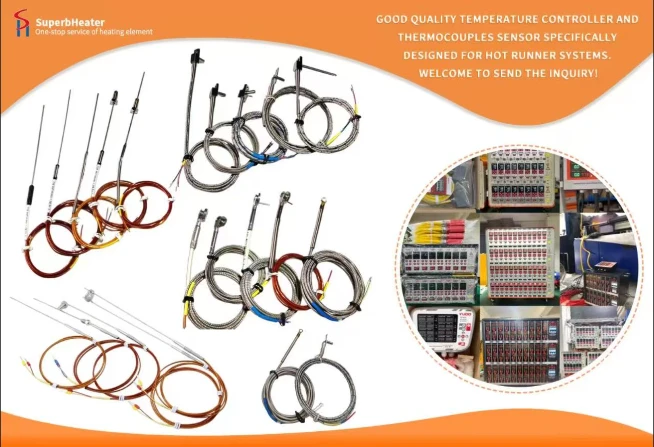
Even the best thermocouple will perform poorly if installed incorrectly. In hot runner applications, installation errors are a leading cause of temperature inaccuracy, premature failure, and controller alarms. This article catalogs the most frequent mistakes and provides practical guidance to avoid them.
Mistake 1: Incorrect Insertion Depth. Thermocouples must reach the designed depth to sense the correct temperature. Inserting too shallow places the sensing junction in a cooler zone (near the mold plate), causing the controller to overheat the nozzle. Inserting too deep may allow the probe to touch the heater or the tip of the bore, leading to mechanical damage or inaccurate readings. Always check the bore depth against the probe length. The standard rule: insert until the probe is at least two-thirds of the bore depth, leaving about 0.2 mm clearance from the bottom to avoid crush.
Mistake 2: Poor Thermal Contact. The thermocouple must have intimate contact with the metal bore. An air gap acts as a thermal insulator, slowing response and introducing offset. This is often caused by not using spring-loaded designs, omitting thermal grease, or using the wrong diameter probe. For smooth bores, spring-loaded probes are essential. For threaded probes, ensure the threads are clean and use anti-seize compound that is thermally conductive. High-temperature thermal grease (rated >400°C) can improve contact significantly.
Mistake 3: Over-Tightening. When installing threaded thermocouples or compression fittings, over-tightening can deform the sheath, crack the MgO insulation, or break internal wires. Always use a torque wrench set to the manufacturer's specification. For M3 or M4 threads, typical torque is 2–4 N·m. Over-tightening also makes future removal difficult.
Mistake 4: Sharp Bends in the Sheath. Mineral-insulated sheaths can be bent, but only to certain radii. Bending too sharply (less than 5× sheath diameter) can kink the sheath and fracture the internal conductors. Always use a bending tool to achieve gradual curves. Avoid repeated bending, which causes work hardening and fatigue. Once bent, do not straighten and re-bend.
Mistake 5: Improper Wire Routing. Thermocouple extension wires must be routed away from heater cables, motor leads, and other high-voltage sources to prevent EMI. Crossing at 90 degrees is acceptable, but parallel runs should be separated by at least 20 cm. Use shielded cables and ground the shield at the controller end. Also, avoid routing wires near moving parts or sharp edges that can abrade insulation.
Mistake 6: Using Copper Wire Instead of Extension Wire. A common error is splicing copper wire to thermocouple leads to extend length. This creates additional thermocouple junctions at the splice points, introducing errors of several degrees. Always use the correct thermocouple extension wire (same alloy composition) with matching color codes. Solder joints are also problematic; use proper connectors or cold-splice techniques.
Mistake 7: Reversed Polarity. Connecting the positive and negative leads backward reverses the output sign. The controller may show negative temperature or a low value. This is especially common when using different connector standards or after rewiring. Always verify polarity using color codes: for Type K, yellow outer jacket with red positive (chromel) and black negative (alumel); for Type J, black outer jacket with white positive and red negative. Mark connectors clearly.
Mistake 8: Ignoring Cold-Junction Compensation. The controller's terminal block is a cold junction. If the controller is placed near a hot mold or in a drafty area, the CJC sensor (thermistor or RTD) may not accurately measure terminal temperature. Ensure the controller is in a stable temperature environment (10–40°C). Also, keep thermocouple connector pins clean and tight; poor contact adds resistance and mimics a temperature offset.
Mistake 9: Mixing Thermocouple Types. Using a Type J thermocouple with a Type K controller input (or vice versa) results in large errors because the voltage-temperature tables differ. Always match the thermocouple type to the controller channel setting. Many controllers allow per-channel type configuration. Double-check both sensor and controller settings.
Mistake 10: Not Securing Cables. Loose cables can be pulled during mold opening or closing, stressing the connection point. Always use strain relief clamps. Secure cables along the mold base with tie wraps, leaving service loops to accommodate movement. At the connector, use threaded coupling rings rather than push-fit connectors if vibration is high.
Mistake 11: Installing Without Checking Calibration. Even new thermocouples can have manufacturing tolerances. Install and test the sensor at setpoint using a reference probe or a thermocouple simulator. Apply any necessary offset in the controller. Document the offset. Skipping this step means accepting whatever error the sensor brings.
Mistake 12: Forgetting to Record Installation Details. Note the date, thermocouple serial number, type, insertion depth, and any offset for each zone. This record helps track drift and schedule replacement. Without it, troubleshooting becomes guesswork.
Best Practices Summary. Use the correct type and length. Install to the proper depth with thermal grease. Route cables separately and securely. Use torque tools. Test before production. Maintain records. These simple steps eliminate most installation-related problems.